|

Car guys have always had to battle the public stigma
of driving their works-in-progess. It's the beauty is in
the eye thing, except that no one applies that rationality
to a guy and his project car, or truck in this case.
The only guys that society seems
to tolerates driving a 15-foot long contractor-white 80's
F150 are landscapers, city workers, and appliance haulers.
Anyone else piloting this square heap will attract contemptuous
looks and nasty glares. So you just have to let it
slide off your back and press on with whatever appeals to
your senses. This is precisely why we're upgrading
the exhaust system on the Big & Ugly Work truck. We're
out to appeal to our auditory senses with a set of headers
and Flow's. It's the perfect modification to projects like
this - because we know the resultant rumble and roar will
make us impervious to societies stares and glares.
DIY Exhaust
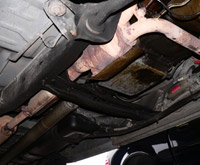
The biggest restrictions are
between the manifolds and the first catalytic converter. |
You'd think that with a 5.0L powerplant the '87-'96 F150
should sound like a Mustang. Unfortunately about all it shares
in common with the Fox body Mustang exhaust system is the
restrictive cast iron manifolds. From there the F150 plumbing
routes both banks into a pre-catalytic converter. From here
it goes into a short 3-inch pipe leading to the second converter.
The gasses are then squeezed out through a 2-1/4" single
tube and into big cylindrical muffler before wheezing it out
a limp tailpipe behind the right wheel.
If we weren't restricted by California's illogical smog laws
we'd put in a true dual exhaust system. A set of headers followed
by an H or X pipe, and then a pair of mufflers. We'd even
run a pair of high-flow catalytic converters and we know it
would pass with flying colors. However the state bureaucrats
won't allow for the factory exhaust configuration to be changed.
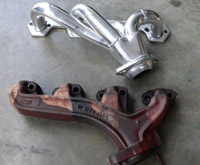
A set of shorty headers will pave
the way for an eventual head upgrade. |
Since our hands are tied we opted for the best we could.
We picked up Flowmaster's "cat back" exhaust kit
for this era of F150. It features their 50-series SUV/Truck
muffler in a single-in and dual-out configuration. We've also
opened things up with a pair of Flowtech shorty headers. Without
tackling the restrictive catalytic converter section we're
not expecting any significant power increases. However it's
just a beater truck and the exhaust note quality is what we
are really after for now. Listen to the before and after (side
bar) and you'll see what we mean.

Can Flowmaster's clamp-together
muffler kit go together straight and leak free? We're
about to find out. |
The Flowmaster kit is meant to be a DIY kit. It comes complete
with clamps, brackets, and tubing engineered to fit any of the
F150 cab and bed lengths. Clamp together exhaust systems tend
to get a bad rap. They often leak and sag, leading the owner
to inevitably pay an exhaust shop to weld it together. We wanted
to see if a guy could really install this himself without the
need to weld up pipes. Greg Coons of Greg's Mufflers and General
Automotive Repair, in Lafayette CA, offered to show us how to
properly install a clamp together kit. He offered up plenty
of tips to make the kit look like a professionally installed
job, leak and sag free.

 We drove the F150 over to Greg's Mufflers in Lafayette,
California. Greg's has been serving the East Bay for over
30 years and has one of the largest Flowmaster stocks
around.
 |
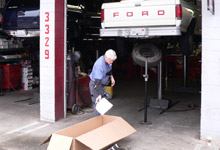
 We asked Greg to attempt to install this kit as a regular
guy would in his driveway. He did exactly what one of
us would, which is to throw the supplied instructions
to the side. "We don't need no stinkin' instruction
manual."
 |
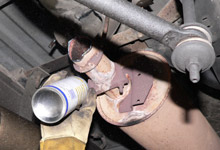
 The first tip - soak all the rubber exhaust mounts in
WD40. You'll go nuts fighting them dry and they'll either
win or self destruct. Let 'em soak and the hangers will
slide right out.
 |

 The task begins with cutting out the stock muffler and
exhaust piping just to the second catalytic converter.
Greg uses a torch, but an Sawzall or hacksaw would accomplish
the same.
 |
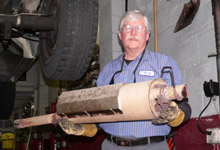
 The factory muffler uses a single 2-1/4" inlet and
outlet. We presume the inside of the muffler consists
of a perforated tube and fiberglass sound deadening material.
Whatever, its headed to the scrap heap.
 |
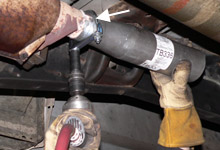
 Since we're in California we have to keep the converters
in place. This means using the supplied transition pipe,
which takes the 2-1/4" converter outlet and steps
it up to 2-1/2". Slip it on ensuring the button on
the converter pipe lines up with the notch in the tube
(see arrow.) A supplied 2-1/2" clamp is positioned
right against the button.
 |
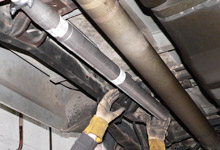
 The kit includes a oversized intermediate pipe. Unless
you have the crew-cab and 8' bed this pipe will surely
need to be cut to length. Greg shows us how to do this
properly so that you don't cut too short and end up with
out of whack muffler and tip alignment. First slip the
pipe completely onto the converter transition pipe.
 |
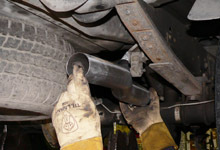
 Temporarily install the passanger side tail pipe. It routes
over the axle housing and slips into the existing factory
hanger.
 |
|

