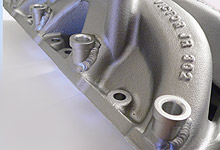
 One look at the Mass-Flo EFI modified Victor Jr. and you
get a sense of their workmanship. The injector bungs are
precisely TIG welded into each runner.
 |

 As many of you know we believe power is in the details.
Before we bolt this manifold on we'll take a sanding roll
and smooth out the injector bungs with the roof of the
runner.
 |

 We didn't have the time to fully gasket match the ports
to the heads but we did clean up minor casting remnants.
 |

 The manifold also came tapped for the engine coolant and
intake air temperature sensors. The ECT goes in here.
 |
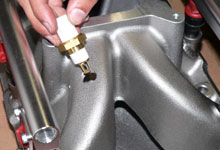
 The IAT goes into the #8 runner - no specific reason it
is located here other than where that connector is located
in the harness.
 |

 The manifold goes into place between the heads no differently
than the carbureted variety.
 |

 The injectors and fuel rails can go into place next. Use
a bit of petroleum jelly on the injector O-ring. Set the
injectors in the manifold bungs first, then line up and
carefully push down the fuel rails. Be sure to sandwich
the hold down "seats" between the two end injectors
on each rail (see picture #8).
|
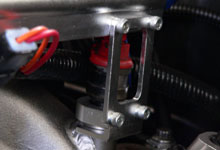
 The injectors and rails are held down with the supplied
brackets shown. Note the lower hold-down "seat"
sandwiched between the injector and rail. The end injectors
must be turned so the connector faces inward.
 |

 We've put in the 190°F thermostat recommended for
the Ford EEC-IV system.
 |

 The throttle body goes on like a carburetor. It can be
positioned so the linkage is on the driver or passenger
side (idle air control valve at front or back.)
 |

 We found the stock mechanical throttle pedal linkage to
interfere with the driver side fuel rail. Our solution
was to flip the throttle body so the linkage is on the
passenger side and to convert to a cable operated throttle.
 |

 A TFI (thick film ignition) style distributor must be
used. If you pull a distributor from a donor EFI vehicle
make sure the distributor cam gear is compatible with
your cam.
 |

 Mounting a Ford TFI coil is tough without a factory bracket.
We pulled this one from a Fox body Mustang and modified
it to mount flat against the early Mustang fender well.
All that is needs for wiring is the connector from the
supplied harness. If you run an MSD 6 box then use the
MSD
8874 adapter harness.
 |

 A barometric pressure sensor needs to be installed. Available
new through Ford for $30, or pick up a few at a Pick N
Pull for a few bucks from any Ford EFI vehicle. Take the
factory self tapping screws too for a clean look. Note
the vacuum port is left open because this is technically
a Manifold Absolute Pressure (MAP) sensor.
 |

 The kit includes a pair of 18mm oxygen sensor fittings.
These must be welded into the exhaust, ideally in the
header collectors. Use any three-wire Bosch O2 sensor
listed for '87-'93 5.0L Mustangs.
 |

 Mass-Flo instructs cutting a 1-1/4" hole in the air
cleaner base to pass the MAF sensor connector through.
This seems rather large an unnecessary to us. We simply
pulled the three wires out of their connector, fed them
through the existing PCV port in the base, and the reassembled
the connector. There is enough slack in the harness to
move the base clear over to the fender in the event you
need to access the throttle body or manifold.
 |
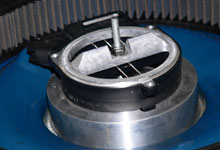
 You'll likely need to cut a 1/2"-20 piece of all-thread
to function as an air-cleaner stud. The mass-air meter
must be held down using the supplied Nylock nut. This
nut just needs to make contact with the meter, do not
tighten it as it will crack the meter bridge.
 |
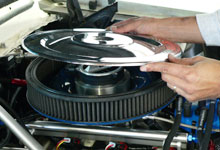
 A nice benefit to the Mass-Flo setup is more underhood
clearance than with a carburetor (nearly 1/2" more.)
Use the tallest air-filter you can fit under the hood.
Once the lid goes on it is pretty tough to tell at a glance
that this is a modern fuel injected vehicle.
 |

