Programming
the Fan Controller
Now that I had confirmed the fan was
wired correctly to the manual
override switch, it was time to verify the functionality of
the
controller's automatic feature. At a programmable "Low"
temperature, the controller is designed to initiate the fan
at full speed, this is then
followed immediately by the fan settling to 50% of its maximum
RPM. The
controller will steadily increase fan RPM towards 100% until
it reaches a
programmable "High" temperature. Once the "High"
temperature is reached, the fan will remain at full RPM until
the engine cools to the point that the fan can lower its'
speed. Pretty simple. Here's how to set it up.

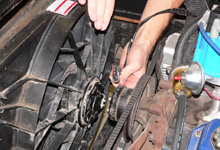
 It's important to unplug the fan prior to programming.
Since the
controller comes preprogrammed with a 160 degree "Low"
setting and a 200 degree "High" setting, unplugging
the fan is necessary to make sure you reach your desired
"High" temperature while programming.
|
|

 Next, I fired up the engine and kept a watchful eye on
the temperature gauge.
|
| |
|
|

 The three LEDs on the controller flash on and off to let
the user know
that the fan is unplugged and the controller is ready
for programming. |
|

 I waited for the engine temperature to each 170 degrees.
 |
| |
|
|

 Once reached, I held down the "Low" button for
three seconds. The
yellow LED flashed indicating that it received my desired
"Low"
temperature setting. |
|

 I let the engine climb to 210 degrees.
|
| |
|
|

 I performed the same process for the "High"
setting except this time I
depressed the "High" button for three seconds.
The red LED flashed
indicating that it received my desired "High"
temperature setting.
Programming was complete.
|
|

 In order to verify that the controller received my custom
program, I allowed the engine to cool for 30 minutes,
plugged in the fan and fired the engine back up. The controller
worked perfectly.
 |
Conclusion
While the Lincoln Mark VIII electric
fan conversion is a rewarding upgrade, be aware that trimming
the shroud may not be enough to fit your specific application.
I experienced a "no-fit" situation when trying to
squeeze the assembly into a big block car on an intermediate
size chassis. The SPAL controller used in this article and
respective installation steps, all apply to a number of aftermarket
fans offered by manufacturers such as SPAL, Flex-A-Lite, BeCool
etc. Be sure to take accurate measurements of your allowable
space prior to purchasing an aftermarket fan. Good Luck. 
|
|
|
|
|
Posted by GrandSAC, 05/04/11 06:05am:
I installed a Mark 8 fan in my 89 Mustang.
It was a very tight fit but it does work.
I used a Dakota Digital controller to manage
this fan. It works great. The only problem has
been the main power fuse for the fan itself.
I originally installed a 40A automotive fuse,
but it blew after some use. I could not find
a 50A slow blow fuse so I went with a 50A
self resetting circuit breaker. Cost me about
$8. Works great! The fan and controller does
a very good job of keeping my well built
347 cool. I programmed the controller to
a working range of 165 to 180 degrees.
.
|
|
| |
|
|
Contact Information
If you have an questions or comments about this article
please feel free to contact Jon Mikelonis by email
at [email protected] |
|
|

